-
CATEGORY ::
- All Seeds /
- All Fruit Seed


Banana - Ensete
SEASON
Perennial
USDA ZONES
7 - 10
HEIGHT
28 inches
ENVIRONMENT
Full sun to partial shade
SEASON
Perennial
USDA ZONES
4 - 8
HEIGHT
4 inches
WIDTH
9 inches
BLOOM SEASON
Late spring to early summer
BLOOM COLOR
Yellow with red fruits
GROWTH RATE
Fast
ENVIRONMENT
Partial shade
FOOT TRAFFIC
No
SEASON
Perennial
USDA ZONES
4 - 8
HEIGHT
6 inches
WIDTH
12 - 18 inches
BLOOM SEASON
Late spring to early summer
BLOOM COLOR
Pink
GROWTH RATE
Fast
ENVIRONMENT
Full sun to partial shade
FOOT TRAFFIC
Light
SEASON
Perennial
USDA ZONES
4 - 8
HEIGHT
6 inches
WIDTH
12 - 18 inches
BLOOM SEASON
Late spring to early summer
BLOOM COLOR
White
GROWTH RATE
Fast
ENVIRONMENT
Full sun to partial shade
FOOT TRAFFIC
Light
SEASON
Perennial
USDA ZONES
7 - 10
HEIGHT
72 inches
ENVIRONMENT
Full sun to partial shade
SEASON
Annual
USDA ZONES
5 - 11
HEIGHT
48 inches
BLOOM SEASON
Late spring to mid summer
BLOOM COLOR
White
ENVIRONMENT
Full sun
SOIL TYPE
pH 6.0 - 8.0
DEER RESISTANT
No
AAS WINNER
1939
SEASON
Annual
USDA ZONES
2 - 8
HEIGHT
16 - 20 inches
BLOOM SEASON
Early summer to early fall
BLOOM COLOR
Red
ENVIRONMENT
Full sun to partial shade
SOIL TYPE
Well drained soils, pH 6.1 - 7.8
SEASON
Perennial
USDA ZONES
2 - 8
HEIGHT
16 inches
BLOOM SEASON
Summer
BLOOM COLOR
Purple
ENVIRONMENT
Full sun
SOIL TYPE
Combination of sand and organic matter, acidic soils
About...
Banana (Musa Ensete) - This Musa Ensete bush is cold hardy into and north of USDA Hardiness Zone 8. Regardless of your climate, you can always enjoy banana type bushes in containers or in greenhouses or as tender perennials. If you crave amazing, tropical, bold-textured foliage and exotic flowers in your garden, you should try growing your own banana bush!MORE FRUIT OPTIONS
Banana (Musa Ensete) - This Musa Ensete bush is cold hardy into and north of USDA Hardiness Zone 8. Regardless of your climate, you can always enjoy banana type bushes in containers or in greenhouses or as tender perennials. If you crave amazing, tropical, bold-textured foliage and exotic flowers in your garden, you should try growing your own banana bush!
Musa ensete is one of the hardiest types of the Musa family and has very large seeds. This small tree is ideal for conservatories, patios, or as a large potted plant. Only grows about 6 feet tall and is grown for its foliage; unfortunately, no bananas on Musa Ensete. Decorative, huge leaves rivalling any expensive mature house plants. Grows 3 feet in the first four months after seed germination!
Sow anytime of year after soaking the seeds for 24 hours in lukewarm water. Use a peat based seed compost and sow 1/4 inch deep. After sowing, seal the seed container inside a polythene bag in order to keep the compost moist. Germination is slow and erratic and can take 1 - 6 months at 80F. As each seed germinates, transfer it to a 3 in pot of good free draining compost, taking care not to damage the fragile roots. Pot on as required, the larger the container the larger the plant will grow.
Grow Musa ensete bush in warm, well lit conditions. During summer they can be stood outside or planted in the border but should be brought into well lit frost free conditions for the winter when it should be kept moderately dry. Some discoloration of the leaf ends may occur through the winter months but this won't harm the plant.
Common Questions
Are banana trees easy to care for?
Banana trees are easy to grow if they have optimal conditions (indoors or outdoors). Give your banana tree lots of water, light, and fertilizer.
Do bananas need pollination to bear fruit?
Hybrid bananas are self-pollinating, so they don't need pollinators to bear fruit. Wild bananas, on the other hand, need to be pollinated by fruit bats.
How long does a banana tree take to bear fruit?
In the right conditions outdoors, a banana tree may bear fruit in 15 to 18 months after planting. After the banana has flowered and produced fruit, it dies back to the ground and another banana plant sprouts from the same roots.
Planting Directions
TEMPERATURE
Lower temperatures of less than 41F are very effective
AVERAGE GERM TIME
42 - 54 days
LIGHT REQUIRED
No. Do no leave in direct sunlight
DEPTH
Do not cover seed, but press tightly in to soil
SOIL TYPE
Well-drained soils, pH 5.8 - 7.2
SOWING RATE
4 - 5 seeds per cell or approximately 5000 seeds covers 100 square feet
MOISTURE
Constant moisture must be maintained until all germination occurs
PLANT SPACING
18 inches
Indian Strawberry (Duchesnea Indica Tuttifrutti) - Start Strawberry seeds for this rare ground cover plant that will get lots of attention! It is an Indian Strawberry plant with lovely yellow blooms, and it produces small red Strawberries all summer long on a creeping evergreen carpet. Indian Strawberry is well-suited for hanging over a wall or as a ground cover plant. Indian Strawberry ground cover is naturalized throughout the United States, and it is found growing in shady places in woods and grassy slopes. Indian Strawberry prefers a moist, but well-drained soil in a partially sunny position. Once Indian Strawberry plants are established, the matted root sends out runners to set new plants. Indian Strawberry leaves are light green and finely haired. Indian Strawberry flowers are small, yellow, and are 5 petaled. They first appear in April and will bloom throughout the summer until fall. The fruit is small, about 1/2 inch round. It is edible, but many say the taste is not noteworthy. Birds, however, love the red fruit. Another common name for this variety is Mock Strawberry ground cover.
Sow Indian Strawberry seeds from January to April indoors. Use quality seed starter mix, and small pots or starter trays. Sow the Strawberry seeds on the surface and press the seed into the mix. Keep the soil damp but not wet, and protect the Indian Strawberry ground cover seeds from direct light. Seal the starter tray or pots inside a plastic bag until after germination. When the Strawberry seedlings are large enough to handle, transplant them into 3 inch pots, and grow them on in cooler conditions until large enough to plant outdoors. After all danger of frost has passed, harden the young Mock Strawberry plant over a period of 7 - 10 days before planting outdoors in its permanent location.
Common Questions
Will deer eat Duchesnea Indica?
No, deer tend to avoid these plants.
How are plants used in the landscape?
These plants can be used in containers, as a ground cover, mass planting, woodland areas and drought tolerant gardens.
Are plants easy to maintain?
Yes, these plants are easy to maintain, may want to mow in the spring to keep healthy.
Planting Directions
TEMPERATURE
60 - 75F
AVERAGE GERM TIME
14 - 30 days
LIGHT REQUIRED
Yes
DEPTH
Seed should be surface sown and if covered, covered very lightly with medium
SOIL TYPE
Well-drained soils, pH 5.8 - 7.2
SOWING RATE
5 - 6 seeds per plant or 500 seeds per 10 square feet
MOISTURE
Constant moisture must be maintained until germination
PLANT SPACING
16 inches
Wild Strawberry - Baron (Fragaria Vesca Baron Solemacher) - Grow Strawberry seeds for this old-fashioned favorite ground cover plant. Known as Wild Strawberry, Woodland Strawberry or Alpine Strawberry, this wild Fragaria Vesca is very hardy and a strong grower. This edible, cold tolerant Strawberry is known to have been harvested and eaten by stone-age man, traded from Europe along the Silk Road into Asia. Alpine Strawberry plants have quite a history! Wild Strawberries do not send out runners like other Strawberry plants do, so they are easier to contain and keep them where you desire for them to grow.
Growing Fragaria Vesca From Seed: Sow the Strawberry seeds from January to April indoors. Use quality seed starter mix, and small pots or starter trays. Sow the Wild Strawberry ground cover seeds on the surface and press the seed into the mix. Keep the soil damp but not wet, and seal the starter tray or pots inside a plastic bag until after germination. When the Strawberry seedlings are large enough to handle, transplant them into 3 inch pots, and grow them on in cooler conditions until large enough to plant outdoors. After all danger of frost has passed, harden the young Wild Strawberry plants over a period of 7 - 10 days before planting outdoors in their permanent location.
Common Questions
How can these plants be used in the landscape?
Fragaria Vesca can be used for edging plants, ground covers, in patio containers, in herb beds and informal borders.
Do I need to prune my plants?
Yes, you should remove any excess runners.
Planting Directions
TEMPERATURE
60 - 75F
AVERAGE GERM TIME
14 - 30 days
LIGHT REQUIRED
Yes
DEPTH
Seed should be surface sown and if covered, covered very lightly with medium
SOIL TYPE
Well-drained soils, pH 5.8 - 7.2
SOWING RATE
5 - 6 seeds per plant or 500 seeds per 10 square feet
MOISTURE
Constant moisture must be maintained until germination
PLANT SPACING
16 inches
Wild Strawberry - White Soul (Fragaria Vesca White Soul) - If you want a vigorous perennial ground cover plant, grow Strawberry seeds! These hardy perennials provide fresh strawberries in small spaces. Fragaria white Strawberry produces ongoing blooms and delicious white berries. This Strawberry plant produces a heavy crop with the same leaf size and structure as red Strawberry varieties. White Strawberry plants do not spread with runners, and their berries are very sweet and have a hint of pineapple in their taste. The flowers and fruit continue all season and the plants make great edgings for gardens. Birds are said to not eat the white Strawberries like they are known to eat the red varieties.
Growing Fragaria Vesca From Seed: Sow the Fragaria white Strawberry seeds from January to April indoors. Use quality seed starter mix, and small pots or starter trays. Sow the Fragaria Vesca white seeds on the surface and press the seed into the mix. Keep the soil damp but not wet, and seal the starter tray or pots inside a plastic bag until after germination. When the Strawberry seedlings are large enough to handle, transplant them into 3 inch pots, and grow them on in cooler conditions until large enough to plant outdoors. After all danger of frost has passed, harden the young white Strawberry plants over a period of 7 - 10 days before planting outdoors in their permanent location.
Common Questions
How can these plants be used in the landscape?
Fragaria Vesca can be used for edging plants, ground covers, in patio containers, in herb beds and informal borders.
Do I need to prune my plants?
Yes, you should remove any excess runners.
Banana (Musa Velutina) - There's something mystical about a pink velvet banana that will make your neighbors want one of these special banana trees too. Let Musa velutina be your first introduction to hardy bananas and let it become a favorite in your summer garden. Rarely exceeding 3 feet tall, Musa velutina produces copious flower stalks near the top of the trunk, starting in late summer. Each stalk is soon home to attractive clusters of small, pink, velvet bananas, which peel themselves when ripe.
Once established, they seem to be quite winter-hardy. Until well-established, a cage of shredded leaves around the trunk in the winter months should do the trick. Grow as a perennial in zones 7b - 10 or greenhouse in winter months. Musa Veluntina will grow in full sun to partial shade.
The cinnamon scent, exotic leaves and extraordinary color of the musa velutina transforms any garden into a tropical oasis. It is an exotic type of banana tree which produces mysterious pink fruits instead of the usual yellow bananas we know. Although the actual flesh of the fruit is edible, the numerous large and small seeds are not which makes the consumption virtually impossible. Nevertheless, it is striking just in its appearance and will definitely spice up any garden.
To plant this banana seed, it is recommended to roughen the seed with sandpaper and keep it in water (room temperature) for about 12 - 24 hours before planting it. Special cultivating soil or coconut fiber is essential as these types of soil are particularly permeable. It is crucial to always keep the soil damp after planting the seed which should be fully covered in earth about 1/4 inch deep.
To enable the quick development of sprouts, plant the seed into a special breeding container to cultivate it and ensure that the temperature in the pot remains around 80 degrees. If cultivation at these temperatures is not possible, the sprouting process may take up to 10 weeks. The container should also be covered up by a transparent cover such as foil or glass but at the same time avoid mold by taking off the cover once every 3 days and letting a little air get to the soil.
Common Questions
Are banana trees easy to care for?
Banana trees are easy to grow if they have optimal conditions (indoors or outdoors). Give your banana tree lots of water, light, and fertilizer.
Do bananas need pollination to bear fruit?
Hybrid bananas are self-pollinating, so they don't need pollinators to bear fruit. Wild bananas, on the other hand, need to be pollinated by fruit bats.
How long does a banana tree take to bear fruit?
In the right conditions outdoors, a banana tree may bear fruit in 15 to 18 months after planting. After the banana has flowered and produced fruit, it dies back to the ground and another banana plant sprouts from the same roots.
Planting Directions
TEMPERATURE
70F
AVERAGE GERM TIME
10 - 14 days
LIGHT REQUIRED
Yes
DEPTH
1/2 - 1 inch
SOWING RATE
1 - 2 seeds per plant
MOISTURE
Keep seeds moist until germination
PLANT SPACING
18 - 36 inches
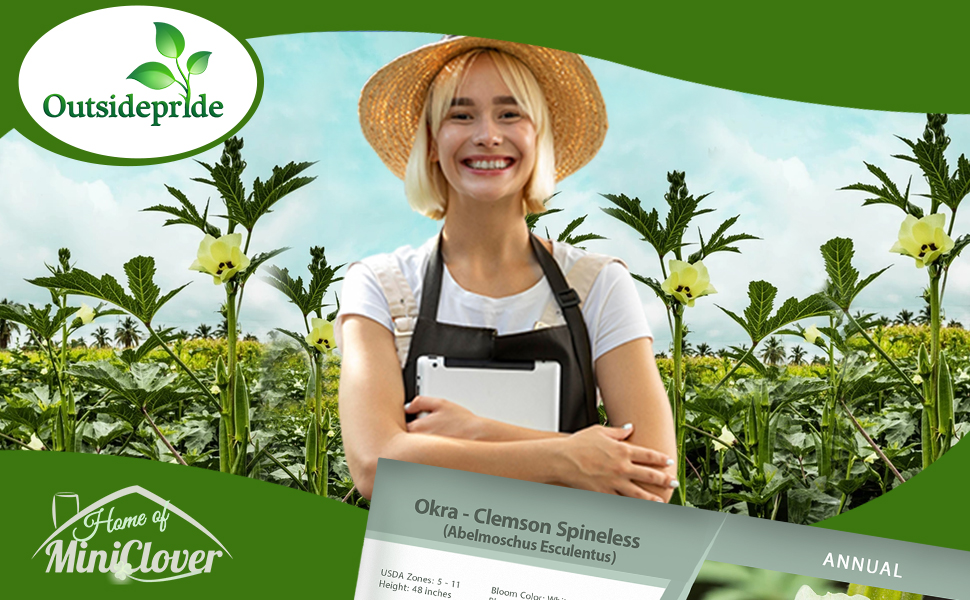
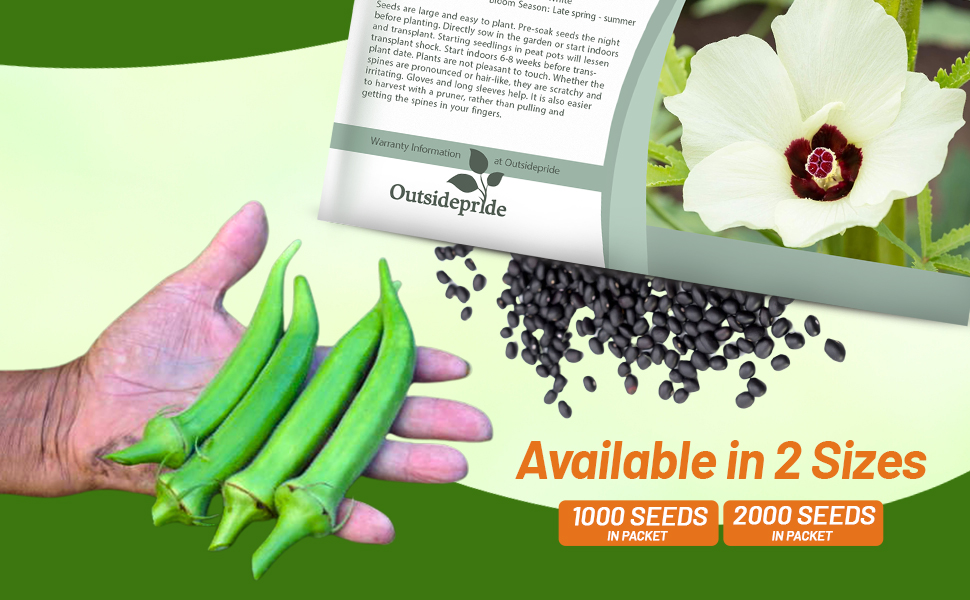
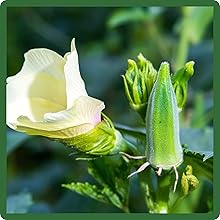
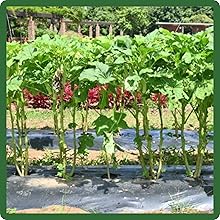
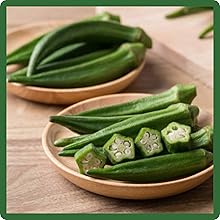
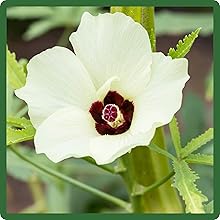

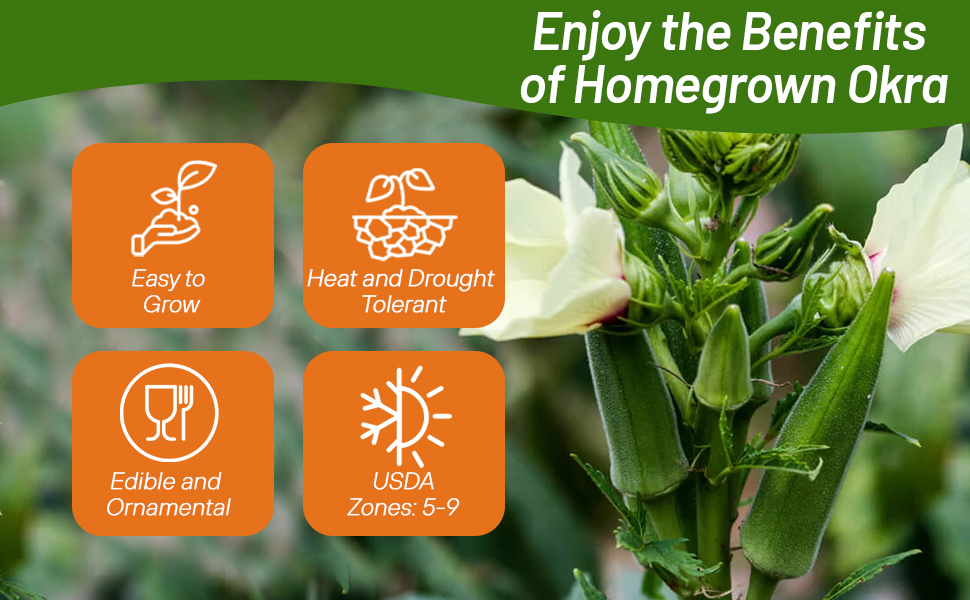
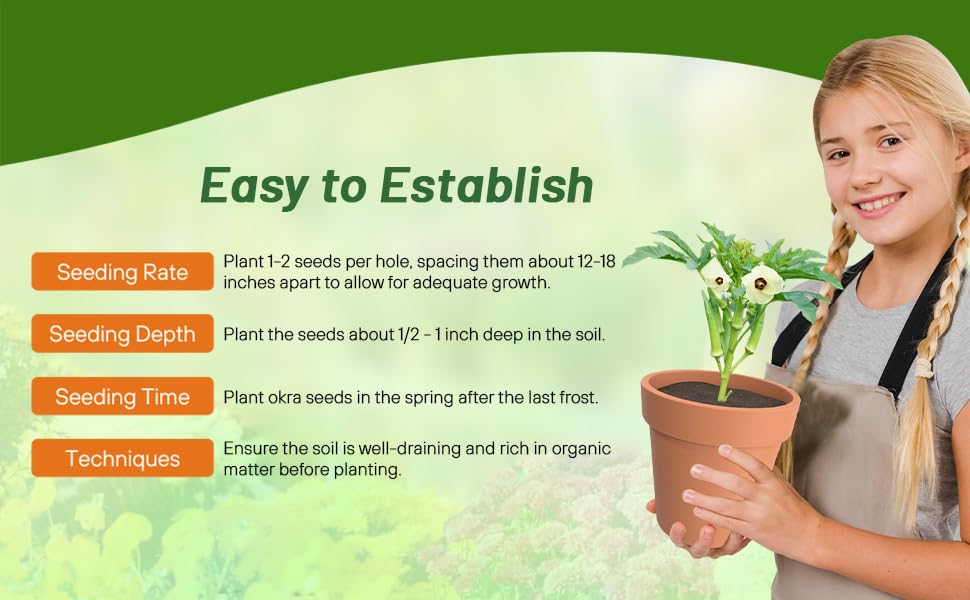
Okra - Clemson Spineless (Abelmoschus Esculentus) - Grow Okra seeds for this edible and ornamental herb plant. The lovely flowers are hibiscus-like and creamy white in color. This variety of Okra has deep green, ribbed, spineless pods. Pick the pods young while they are still tender. A test for tenderness is to snap off the end of a pod. If it snaps, it has not become tough and fibrous yet and should still be good for eating. Okra pods are excellent for use in soups, stews, and is excellent fried. Okra plants can reach 48 inches or more in height, or the herb plants can be topped and grown shorter. If given room to branch out, Okra herb plants can spread 36 inches in width. The Okra herb is extremely drought and heat resistant and a popular herb or vegetable in many countries with difficult growing conditions. Okra is a heat lover and grows best when temperatures reach 80 to 90 degrees
How To Grow Okra From Herb Seeds: Okra seeds are large and easy to plant. Some herb gardeners like to pre-soak their Okra seeds the night before planting. Okra herb seeds can be directly sown in the herb garden or started indoors and transplanted. Starting seedlings in peat pots will lessen transplant shock. Start herb seeds indoors 6 - 8 weeks before transplant date.
Okra plants are not pleasant to touch. Whether the spines are pronounced or hair-like, they are scratchy and irritating. Gloves and long sleeves help. It is also easier to harvest with a pruner, rather than pulling and getting the spines in your fingers. 1939 AAS Edible Vegetable Winner.
Common Questions
Which herbs can thrive in the kitchen?
Not all herbs are suitable for indoor growth. Herbs with woody, bushy growth, like rosemary are too large for indoor herb gardens. Consider other more suitable herbs for an indoor kitchen garden, such as chives, oregano, thyme, dill, mint, basil, cilantro, sage and savory. Each herb has specific growing needs, so ensure to provide the right amount of light, humidity, and air circulation. If using a single large container, ensure that all plants require similar amounts of sunlight and water. For instance, chives and cilantro may not need as much sunlight as dill and oregano.
What are good companion plants for herb gardens?
Pairing herbs based on watering requirements, like planting lavender with thyme or basil with chives, is ideal for maintaining the health of both plants. Avoid companion planting with catnip, lemon balm and mint as they should be grown in separate pots due to their rapid spreading nature that can overtake other plants in your indoor herb garden.
When do I establish an indoor herb garden?
Create a kitchen herb garden by propagating cuttings from your outdoor plants as the weather cools in the fall. If you opt to sow your indoor herb garden from purchased seeds, begin a few weeks before the anticipated first frost of the season. Most herbs can be harvested within a few weeks, so there is no need to plant too far in advance.
Do kitchen herbs need full sun?
Most herbs need 6 hours of sunlight a day to thrive. If you do not have this type of light available in your kitchen, consider a grow light that will run 14-16 hours per day 6 to 12 inches above your plants. NOTE: Rotate herbs periodically when grown in windows to let each part of the plant receive sunlight.
What time of year should you plant herbs?
Herbs grown in indoor gardens can be planted any time of year. Many gardeners prefer to grow their herbs outdoors during the summer growing season, and then move them to their indoor garden before the first frost of fall. If you prefer to start your seeds outdoors, you will need to wait until after danger of frost in the spring or start your seeds indoors 6 -8 weeks before last frost and transplant in your garden after danger of frost.
Do herbs come back every year?
Perennial herbs will come back each year when planted in the correct zone or grown indoors during the cold winter months. Popular perennial herbs are oregano, parsley, sage, fennel, chives, lavender, thyme and mint varieties.
How do I know when my herbs need watered?
Allow the soil to dry out just slightly before watering your herbs again. Give your indoor herb garden a dose of diluted water-soluble fertilizer every 2 weeks or so. Too much food will compromise the taste of the herbs. It is also beneficial to provide adequate humidity. If the indoor air is especially dry – which is often the case in regions with cold winters. Set the herbs pots on trays of stones. Fill the trays with water but keep the level below the drainage holes of your pots.
When do I water my outdoor herb garden?
Different herb plants will need different amounts of water so keep this in mind when planting your garden and keep similar plants together to simplify watering. Watering is best done in the early morning hours when temperatures are cooler. Many herbs are hardy. They can tolerate soil that is moderately dry. You want to keep an eye out for wilting when the soil is wet. Ideally, your herbs should make quick use of the water you give them. Saturated soil is not what you are after. Pay close attention to the coloration of the leaves on your herbs. Yellow leaves can be a sign of too much water, and so can black leaves. If you spot any mildew or fuzz on the herbs, too much moisture can be the problem.
How do I harvest my herbs?
Trim back flowering sections before they bloom for healthier leaves. Prune new growth on young plants weekly to encourage a fuller mature plant. Snip herbs for harvest when they are just a few inches tall. Pruning back the herbs often means a larger, longer harvest. Cut the new growth back at least one per week, even if you are not using the herbs in recipes (see drying and freezing page if you do not want to waste your harvest). Long stems that are about to set flower buds should be trimmed off as they appear.
What do I need to start an indoor herb garden?
Common tools needed for an indoor herb garden are: garden trowel, scissors for snipping, stones (optional). Materials for your herbs plants include seed, pots, potting soil, cactus potting soil (optional), pots or trays, fertilizer and a grow light if you do not have adequate sunlight of at least 6 hours per day for your plants.
How do I prepare my containers for planting?
Choose large, deep containers with drainage holes to accommodate fast-growing herbs. Fill the container with potting mix leaving about ½ inch clear at the top. Use standard commercial potting soil for most herbs but blend in cactus potting mix for herbs native to the Mediterranean, such as thyme and oregano which prefer dryer soils.
Can I put my indoor herb containers outside?
Yes! Move your potted herbs to the patio or deck when the weather warms in the spring and for a boost of sunshine.
How do I know when my herbs need larger containers?
When roots begin to emerge through the drainage holes of its container, it is time to repot the herbs. Replace the potting mix; the organic material in the potting mix breaks down over time. Remove any plants with woody or thickened stems and replace them with new seeds or seedlings.
Do herbs need fertilizer?
The short answer is yes. However, not all herbs have the same fertilizer needs. Herbs roughly fall into two groups. 1. Slow-growing herbs with small leaves or needles and fibrous, woody stems that are native to the mediterranean where they grow culinary lavender, month, marjoram, oregano, rosemary, sage, savory, tarragon and thyme. 2. Fast-growing herbs with larger, thinner leaves. These can be annuals such as basil, borage, cilantro, chervil and dill; bi-annual herbs such as parsley or perennials such as chives. Herbs in the first group generally need less fertilizer than herbs in the second group.
What type of nutrients do herbs need?
Start out by planting herbs in healthy soil rich in organic matter. In addition, they will benefit from an organic complete, slow-release fertilizer containing equal amounts of macronutrients nitrogen, phosphorus and potassium. A slow-release fertilizer is especially important if your garden has sandy soil because nutrients wash out quickly. To give fast-growing herbs that you harvest often an extra boost, you can also apply fish emulsion, an organic fertilizer that is high in nitrogen, with an NPK ratio of 4-1-1 or 5-1-1.
How often should I fertilize my herbs?
The frequency of fertilization follows the growth pattern of the herbs. In soil of average fertility, it is usually sufficient to apply a balanced fertilizer in the spring when they break dormancy, or when the new growing season starts. For other herbs, a light monthly application of a slow-release complete fertilizer should be enough – unless the leaves start to look yellow, which may be a sign of nitrogen deficiency. In that case, applying fish emulsion is a quick fix but before you reach for the fertilizer bottle, rule out that the yellowing of leaves is not caused by something else.
How do I fertilize my herbs in a container?
Herbs grown in containers need fertilizer applications more often, because with frequent watering that container plants require, the fertilizer in the potting mix washes out more quickly. Just as with sandy soil, it is important to use slow-release fertilizer. The roots of container plants are in a confined space, unlike herbs grown in the garden or raised beds, which can lead to over fertilization if you are not careful. Organic fertilizers are recommended over synthetic which often contain a high level of salts that can build up in the container over time. To prevent this, it is best to use half the strength of the fertilizer amount specified on the label for any type of fertilizer.
Is it possible to overfertilize herbs?
Adding too much fertilizer to herbs usually leads to an excess of nitrogen, which has undesirable results especially for slow-growing herbs. For basil and other thin-leaved herbs, the fast leaf growth induced by nitrogen is fine because you want your plants to be lush. For rosemary and other Mediterranean herbs however, rapid growth means that there is less concentration of essential oils causing the herbs to become less aromatic and have weaker flavor.
How do I prepare garden soil before planting an herb garden?
Once you have picked the location for growing your herb garden, you will need to prepare the soil. If the soil is sandy or clay heavy, add plenty of compost. Even if your soil is in pretty good condition, working some compost into the soil will help provide nutrients to the herbs while they are growing.
Can I harvest my herbs too often?
Many times, when a new gardener is starting an herb garden, they are afraid that harvesting the herbs frequently will hurt them. The opposite is true. Frequent harvesting of herbs will result in the herb plant producing more and more foliage, which increases the amount you are able to harvest. At the end of the season, you can dry or freeze your herb harvest to enjoy home grown herbs all year long.
I don’t have a good sunny spot outdoors for my herb garden, what can I do?
If your yard is mostly shaded, there is not much you can do to change that, but you can pick shade friendly herbs. Parsley, sweet woodruff and mint are good examples of herbs that don’t require as much light. If you are growing plants in low light, manage your expectations. Your herbs will grow but will be slow and results less impressive.
My container soil is staying wet, what do I do?
Choose a container that allow for water to drain. If you over water or if it rains too much a good pot will allow the water to flow to the bottom without soaking and rotting the roots of your plants. You can use rocks or pottery shards to fill the bottom of the container to help with drainage. This applies outdoors too. If your herbs constantly have wet feet, they won’t thrive. Either plan when planting your garden and add some sand for drainage or pick plants that don’t mind wet roots as much.
My herbs plants are going to seed, why?
The short answer is you are not pruning enough. To prevent rapid growth and encourage a bushy habit, be sure to prune your herb plants regularly. The more you pick off your stems and leaves the longer your herb plant will remain in its production cycle. If you start to see flower heads, snip them right away. When you fail to cut back the plant, it is likely to go to seed and complete its lifecycle. Once that happens, many plants die back. Keep cutting and pinching back flowers to prevent this from happening.
Should I throw away my seeds on their expiration date?
Seeds do not have an expiration date, rather they are a sell by date just like food. The dates on seed packages are guidelines to help you know when your seeds are getting old, but it does not mean you need to toss them. Every plant is different. Some seeds last longer than others. Most seeds, if kept cool and dry, will last 2 – 3 years. If you are unsure test them out by growing microgreens.
Planting Directions
TEMPERATURE
70 - 75F
AVERAGE GERM TIME
7 - 14 days
LIGHT REQUIRED
Yes
DEPTH
Barely cover seed with soil
SOWING RATE
3 - 5 seeds per plant
MOISTURE
Keep seeds moist until germination
PLANT SPACING
12 - 18 inches
Strawberry Spinach (Chenopodium Foliosum Strawberry Sticks) -If you want an easy to grow plant which is quite unique, ideal for the border or patio containers, and produces edible fruits, then Chenopodium Strawberry Sticks is your answer.
Strawberry Sticks is a base-branching annual with colorful strawberry-like fruits all along the stems from top to bottom. Chenopodium is typically grown in USDA zones 2 - 8. Does not like to be transplanted so sow Strawberry Sticks seeds where you want to grow the plant.
Common Questions
Do I need to deadhead my strawberry spinach?
If you do not want to have your plants go to seed in your garden you will want to remove the spent flowers before they can self-seed. If you would like to enjoy more strawberry spinach the next growing season, no need to deadhead your flowers.
Do the berries on strawberry spinach taste like strawberries?
No, the berries are similar in color only. They have a flavor more like a mulberry with fruity, floral undertones.
Planting Directions
TEMPERATURE
Sow at 64-71F for 2-4 wks, move to 24-39F for 4-6 wks, move to 41-53F ...more Sow at 64-71F for 2-4 wks, move to 24-39F for 4-6 wks, move to 41-53F for germination...less
AVERAGE GERM TIME
8 - 12 weeks
LIGHT REQUIRED
Yes
DEPTH
1/4 inch
SOWING RATE
2 - 3 seeds per plant
MOISTURE
Keep seeds moist until germination
PLANT SPACING
24 inches
Cranberry (Vaccinium Macrocarpon) - Cranberries can be grown in-doors, in a garden, in planter boxes, raised beds, etc. Cranberries have huge health benefits and can be dry stored for extended periods of time. Cranberries are native to North America and do not need to be grown in a bog. Cranberries do require some soil preparation that is well worth the effort. Cranberry plants can also be grown in large pots as ornamentals. These attractive, spreading plants are a unique addition to any garden. With proper care, you can harvest berries the first year from the cranberry plants.
Common Questions
Which herbs can thrive in the kitchen?
Not all herbs are suitable for indoor growth. Herbs with woody, bushy growth, like rosemary are too large for indoor herb gardens. Consider other more suitable herbs for an indoor kitchen garden, such as chives, oregano, thyme, dill, mint, basil, cilantro, sage and savory. Each herb has specific growing needs, so ensure to provide the right amount of light, humidity, and air circulation. If using a single large container, ensure that all plants require similar amounts of sunlight and water. For instance, chives and cilantro may not need as much sunlight as dill and oregano.
What are good companion plants for herb gardens?
Pairing herbs based on watering requirements, like planting lavender with thyme or basil with chives, is ideal for maintaining the health of both plants. Avoid companion planting with catnip, lemon balm and mint as they should be grown in separate pots due to their rapid spreading nature that can overtake other plants in your indoor herb garden.
When do I establish an indoor herb garden?
Create a kitchen herb garden by propagating cuttings from your outdoor plants as the weather cools in the fall. If you opt to sow your indoor herb garden from purchased seeds, begin a few weeks before the anticipated first frost of the season. Most herbs can be harvested within a few weeks, so there is no need to plant too far in advance.
Do kitchen herbs need full sun?
Most herbs need 6 hours of sunlight a day to thrive. If you do not have this type of light available in your kitchen, consider a grow light that will run 14-16 hours per day 6 to 12 inches above your plants. NOTE: Rotate herbs periodically when grown in windows to let each part of the plant receive sunlight.
What time of year should you plant herbs?
Herbs grown in indoor gardens can be planted any time of year. Many gardeners prefer to grow their herbs outdoors during the summer growing season, and then move them to their indoor garden before the first frost of fall. If you prefer to start your seeds outdoors, you will need to wait until after danger of frost in the spring or start your seeds indoors 6 -8 weeks before last frost and transplant in your garden after danger of frost.
Do herbs come back every year?
Perennial herbs will come back each year when planted in the correct zone or grown indoors during the cold winter months. Popular perennial herbs are oregano, parsley, sage, fennel, chives, lavender, thyme and mint varieties.
How do I know when my herbs need watered?
Allow the soil to dry out just slightly before watering your herbs again. Give your indoor herb garden a dose of diluted water-soluble fertilizer every 2 weeks or so. Too much food will compromise the taste of the herbs. It is also beneficial to provide adequate humidity. If the indoor air is especially dry – which is often the case in regions with cold winters. Set the herbs pots on trays of stones. Fill the trays with water but keep the level below the drainage holes of your pots.
When do I water my outdoor herb garden?
Different herb plants will need different amounts of water so keep this in mind when planting your garden and keep similar plants together to simplify watering. Watering is best done in the early morning hours when temperatures are cooler. Many herbs are hardy. They can tolerate soil that is moderately dry. You want to keep an eye out for wilting when the soil is wet. Ideally, your herbs should make quick use of the water you give them. Saturated soil is not what you are after. Pay close attention to the coloration of the leaves on your herbs. Yellow leaves can be a sign of too much water, and so can black leaves. If you spot any mildew or fuzz on the herbs, too much moisture can be the problem.
How do I harvest my herbs?
Trim back flowering sections before they bloom for healthier leaves. Prune new growth on young plants weekly to encourage a fuller mature plant. Snip herbs for harvest when they are just a few inches tall. Pruning back the herbs often means a larger, longer harvest. Cut the new growth back at least one per week, even if you are not using the herbs in recipes (see drying and freezing page if you do not want to waste your harvest). Long stems that are about to set flower buds should be trimmed off as they appear.
What do I need to start an indoor herb garden?
Common tools needed for an indoor herb garden are: garden trowel, scissors for snipping, stones (optional). Materials for your herbs plants include seed, pots, potting soil, cactus potting soil (optional), pots or trays, fertilizer and a grow light if you do not have adequate sunlight of at least 6 hours per day for your plants.
How do I prepare my containers for planting?
Choose large, deep containers with drainage holes to accommodate fast-growing herbs. Fill the container with potting mix leaving about ½ inch clear at the top. Use standard commercial potting soil for most herbs but blend in cactus potting mix for herbs native to the Mediterranean, such as thyme and oregano which prefer dryer soils.
Can I put my indoor herb containers outside?
Yes! Move your potted herbs to the patio or deck when the weather warms in the spring and for a boost of sunshine.
How do I know when my herbs need larger containers?
When roots begin to emerge through the drainage holes of its container, it is time to repot the herbs. Replace the potting mix; the organic material in the potting mix breaks down over time. Remove any plants with woody or thickened stems and replace them with new seeds or seedlings.
Do herbs need fertilizer?
The short answer is yes. However, not all herbs have the same fertilizer needs. Herbs roughly fall into two groups. 1. Slow-growing herbs with small leaves or needles and fibrous, woody stems that are native to the mediterranean where they grow culinary lavender, month, marjoram, oregano, rosemary, sage, savory, tarragon and thyme. 2. Fast-growing herbs with larger, thinner leaves. These can be annuals such as basil, borage, cilantro, chervil and dill; bi-annual herbs such as parsley or perennials such as chives. Herbs in the first group generally need less fertilizer than herbs in the second group.
What type of nutrients do herbs need?
Start out by planting herbs in healthy soil rich in organic matter. In addition, they will benefit from an organic complete, slow-release fertilizer containing equal amounts of macronutrients nitrogen, phosphorus and potassium. A slow-release fertilizer is especially important if your garden has sandy soil because nutrients wash out quickly. To give fast-growing herbs that you harvest often an extra boost, you can also apply fish emulsion, an organic fertilizer that is high in nitrogen, with an NPK ratio of 4-1-1 or 5-1-1.
How often should I fertilize my herbs?
The frequency of fertilization follows the growth pattern of the herbs. In soil of average fertility, it is usually sufficient to apply a balanced fertilizer in the spring when they break dormancy, or when the new growing season starts. For other herbs, a light monthly application of a slow-release complete fertilizer should be enough – unless the leaves start to look yellow, which may be a sign of nitrogen deficiency. In that case, applying fish emulsion is a quick fix but before you reach for the fertilizer bottle, rule out that the yellowing of leaves is not caused by something else.
How do I fertilize my herbs in a container?
Herbs grown in containers need fertilizer applications more often, because with frequent watering that container plants require, the fertilizer in the potting mix washes out more quickly. Just as with sandy soil, it is important to use slow-release fertilizer. The roots of container plants are in a confined space, unlike herbs grown in the garden or raised beds, which can lead to over fertilization if you are not careful. Organic fertilizers are recommended over synthetic which often contain a high level of salts that can build up in the container over time. To prevent this, it is best to use half the strength of the fertilizer amount specified on the label for any type of fertilizer.
Is it possible to overfertilize herbs?
Adding too much fertilizer to herbs usually leads to an excess of nitrogen, which has undesirable results especially for slow-growing herbs. For basil and other thin-leaved herbs, the fast leaf growth induced by nitrogen is fine because you want your plants to be lush. For rosemary and other Mediterranean herbs however, rapid growth means that there is less concentration of essential oils causing the herbs to become less aromatic and have weaker flavor.
How do I prepare garden soil before planting an herb garden?
Once you have picked the location for growing your herb garden, you will need to prepare the soil. If the soil is sandy or clay heavy, add plenty of compost. Even if your soil is in pretty good condition, working some compost into the soil will help provide nutrients to the herbs while they are growing.
Can I harvest my herbs too often?
Many times, when a new gardener is starting an herb garden, they are afraid that harvesting the herbs frequently will hurt them. The opposite is true. Frequent harvesting of herbs will result in the herb plant producing more and more foliage, which increases the amount you are able to harvest. At the end of the season, you can dry or freeze your herb harvest to enjoy home grown herbs all year long.
I don’t have a good sunny spot outdoors for my herb garden, what can I do?
If your yard is mostly shaded, there is not much you can do to change that, but you can pick shade friendly herbs. Parsley, sweet woodruff and mint are good examples of herbs that don’t require as much light. If you are growing plants in low light, manage your expectations. Your herbs will grow but will be slow and results less impressive.
My container soil is staying wet, what do I do?
Choose a container that allow for water to drain. If you over water or if it rains too much a good pot will allow the water to flow to the bottom without soaking and rotting the roots of your plants. You can use rocks or pottery shards to fill the bottom of the container to help with drainage. This applies outdoors too. If your herbs constantly have wet feet, they won’t thrive. Either plan when planting your garden and add some sand for drainage or pick plants that don’t mind wet roots as much.
My herbs plants are going to seed, why?
The short answer is you are not pruning enough. To prevent rapid growth and encourage a bushy habit, be sure to prune your herb plants regularly. The more you pick off your stems and leaves the longer your herb plant will remain in its production cycle. If you start to see flower heads, snip them right away. When you fail to cut back the plant, it is likely to go to seed and complete its lifecycle. Once that happens, many plants die back. Keep cutting and pinching back flowers to prevent this from happening.
Should I throw away my seeds on their expiration date?
Seeds do not have an expiration date, rather they are a sell by date just like food. The dates on seed packages are guidelines to help you know when your seeds are getting old, but it does not mean you need to toss them. Every plant is different. Some seeds last longer than others. Most seeds, if kept cool and dry, will last 2 – 3 years. If you are unsure test them out by growing microgreens.


